
Are you tired of your countertop cluttered with a bulky microwave? Mounting it under a cabinet can free up valuable space and give your kitchen a sleek look. But if you’re unsure how to tackle this DIY project, you’re not alone.
Many homeowners face the challenge of maximizing kitchen space while keeping appliances accessible. This article will guide you step-by-step through the mounting process. You’ll learn the tools you need, the best practices for installation, and tips to ensure your microwave is securely in place. By the end, you’ll feel confident in transforming your kitchen into a more functional and stylish space.
Key Takeaways
- Maximize Kitchen Space: Mounting a microwave under a cabinet helps reduce countertop clutter and enhances the kitchen’s aesthetics.
- Essential Tools and Materials: Gather necessary tools such as a drill, screwdriver, stud finder, level, and measuring tape to ensure a smooth installation process.
- Proper Preparation: Measure the cabinet space accurately and ensure it’s clear of items and structurally sound to support the microwave’s weight.
- Secure Installation: Always attach the mounting bracket to wall studs for stability, and verify its level before placing the microwave.
- Electrical and Ventilation Considerations: Ensure a dedicated electrical outlet is available and choose between ducted or ductless venting options based on your kitchen layout.
- Safety Precautions: Adhere to weight limits, maintain proper clearance above cooking surfaces, and follow the manufacturer’s installation instructions for a secure and safe setup.
Tools And Materials Needed
Mounting a microwave under a cabinet requires specific tools and materials to ensure a successful installation. Gather the following items before starting the process:

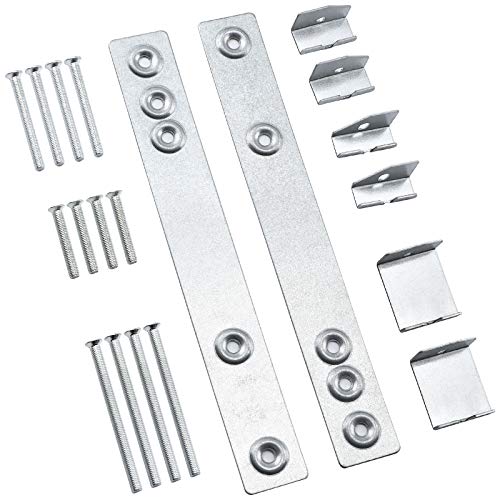
【COMPLETE 70-PC KIT】: This under cabinet microwave mounting kit includes 4 pieces of all necessary hardware, providing a comprehensive solution for a secure and straightforward installation without the need for additional purchases

Part Number : This WX4-A019 microwave under-cabinet mounting kit is a direct replacement for JXA019K, 04A019, 774279, AP3205226, AH311867, PD00050917, PS311867, EAP311867, WX04-F0B6-01, WX04-F0N6-01, WX04-F0P6-01, WX04-FON6-01, WX4-A018, WX4-F0B6-01, WX4-F0N6-01, WX4-F0P6-01, and B00LOX0VSS,ensuring a precise fit for your appliance

ღ【 Exact Part Number Compatibility】- Microwave Mounting Kit WX4-A019 (JXA019K) designed as a direct replacement . This under cabinet microwave mounting kit ensures a precise fit and reliable installation. (PS: Before purchasing, be sure to check whether your model is on the applicable list and measure the dimensions accurately. When installing, follow the instructions for use.)
Tools
- Drill: Use a power drill for making holes in the cabinet and wall.
- Screwdriver: A Phillips or flat-head screwdriver, depending on the screws used.
- Stud Finder: This tool helps locate wall studs for secure mounting.
- Level: Ensures the microwave sits evenly.
- Measuring Tape: For accurate measurements when positioning the microwave.
- Mounting Bracket: Most microwaves come with a mounting bracket; check the packaging.
- Screws and Anchors: Depending on your wall type, you need suitable screws and wall anchors for secure installation.
- Electrical Outlet: Ensure you have a nearby outlet for power. You might need an electrician if the outlet isn’t in place.
- Microwave: Choose a microwave designed for under-cabinet installations.
Ensure you have these tools and materials on hand to make the installation process smooth and efficient.
Preparing The Cabinet Space
Preparing the cabinet space is crucial before you start mounting your microwave. Proper preparation ensures a smooth installation and optimal functionality.
Measuring The Area
Measuring the area accurately sets the foundation for your microwave installation. Measure the width, height, and depth of the cabinet space. Ensure there’s sufficient clearance above the microwave for ventilation. Typically, a minimum of 30 inches above the cooking surface is recommended for safety. Also, check that the microwave fits the mounting bracket dimensions. Use a measuring tape for precise measurements, and jot down your findings for reference.
Clearing The Cabinet Space
Clearing the cabinet space provides a clean and accessible area for installation. Remove any items from the cabinet above the intended microwave area. This includes dishes, appliances, or any decor. Dust and clean the cabinet to create a stable surface for mounting. Inspect the cabinet structure for damage, ensuring it’s sturdy enough to support the microwave’s weight. If necessary, reinforce the cabinet’s shelves or walls to accommodate the microwave securely.
Mounting The Microwave
Mounting a microwave under a cabinet involves specific steps to ensure security and functionality. Follow these guidelines for a successful installation.

STRONG STEEL CONSTRUCTION: Built with thick metal arms for long-lasting support of standard-size microwave units.

Replaceable Models: DE60-20066A microwave mounting flat bolts replacement for samsung under cabinet microwave mount kit AP4219712 2079902 PS4226718.
Part Number: Microwave under cabinet mounting kit WX4-A019 Microwave Installation Kit
Attaching The Mounting Bracket
- Locate the Studs: Use a stud finder to locate the wall studs beneath the cabinet. Proper placement on the studs ensures the microwave’s weight is supported effectively.
- Mark the Bracket Position: Position the mounting bracket as per the microwave’s installation instructions. Typically, the bracket should sit 54 inches from the kitchen floor, but confirm measurements against your microwave model.
- Drill Pilot Holes: Drill holes into the marked positions for screws. Ensure the drill bit size matches the screws you plan to use. Pilot holes help prevent wood from splitting.
- Attach the Bracket: Align the bracket with the pilot holes. Secure it using appropriate screws, making sure it’s level. A level bracket prevents the microwave from tilting.
- Double-Check Stability: Once attached, check the bracket’s stability by gently pulling on it. It should feel secure before proceeding.
- Align the Microwave: With assistance, lift the microwave into position. Align it carefully with the mounting brackets and hooks.
- Insert Safety Screws: Locate the safety screws that come with the microwave. Insert these screws through the holes provided on the bottom of the microwave into the mounting bracket, ensuring a tight fit.
- Connect Venting (if applicable): If your microwave includes an external venting option, connect it according to the manufacturer’s instructions. This may involve attaching a duct to the microwave and the outside vent.
- Plug In the Microwave: Ensure you use a grounded outlet. Plug in the microwave once securely mounted.
- Check Functionality: Test the microwave to confirm that it operates without issues. Ensure that the door opens and closes smoothly.
By following these steps, you can enjoy an organized kitchen space with your microwave safely mounted under your cabinet.
Connecting The Microwave
Connecting the microwave involves two key aspects: the electrical connection and the ventilation options. Each step requires attention to detail for safe and effective operation.
Electrical Connection
To establish a reliable electrical connection, follow these steps:
- Use a Dedicated Circuit: Install the microwave on a dedicated circuit to prevent overloads. This circuit should be rated at 15 or 20 amps, depending on your microwave model.
- Locate the Power Outlet: Ensure that there’s a power outlet secured inside the cabinet or wall behind where the microwave will sit. This outlet should align with the plug on the microwave.
- Plug In the Microwave: Once you’ve mounted the microwave, plug it securely into the outlet. If the outlet isn’t accessible, consider hiring a professional for proper wiring.
- Test Power: After plugging in, test the microwave by running it for a few seconds to ensure it’s functioning correctly.
Ventilation Options
Choosing the right ventilation method is essential for safe microwave operation. You have a couple of options:
- Ducted Venting: This method requires ductwork to expel air outside. If your microwave includes this feature, follow the manufacturer’s instructions for installation. Adjust the fan to ensure efficient removal of smoke and odors.
- Ductless Venting: If external venting isn’t feasible, consider ductless options that use filters to clean the air before recirculating it back into the kitchen. Replace charcoal filters every 6 to 12 months for optimal performance.
- Check Guidelines: Review your specific microwave model’s installation instructions to determine the best venting setup for your kitchen layout.
By carefully connecting the microwave and choosing suitable ventilation options, you’ll enhance both its functionality and safety in your kitchen.
Safety Considerations
Follow these safety guidelines to ensure a secure and effective installation of your under-cabinet microwave.
Weight Limit
Check the manufacturer’s specifications for weight limits. Most under-cabinet microwaves weigh between 50 and 100 pounds. Ensure your cabinet materials can safely support this weight.
Electrical Safety
Use a dedicated outlet for your microwave. Confirm the outlet is grounded and rated for 15 or 20 amps to prevent electrical issues. Avoid using extension cords, as they can pose fire hazards.
Ventilation
Always maintain proper ventilation. If using ducted venting, ensure the microwave vent exits to the outside. If opting for ductless venting, check that filters are in place and functioning.
Install at the Correct Height
Mount the microwave at least 30 inches above the stove to provide enough clearance for cooking activities. This height helps prevent accidental contact with hot surfaces.
Stabilize the Mounting
Securely attach the mounting bracket to wall studs. Use a stud finder to locate studs behind the cabinet. If studs aren’t available, use heavy-duty toggle bolts to ensure stability.
Protect Against Harmful Practices
Avoid obstructing the microwave’s venting system with anything that restricts airflow. Keep the cabinet area around the microwave free from clutter to prevent fires.
Follow Manufacturer Instructions
Adhere to the installation manual provided by the manufacturer. These instructions contain crucial safety information tailored for your specific model.
Taking these precautions ensures a safe and successful installation, allowing you to enjoy an efficiently arranged kitchen.
Conclusion
Mounting a microwave under your cabinet can truly transform your kitchen space. By following the steps outlined and keeping safety in mind, you’ll create a more organized and efficient cooking area. Remember to take your time with measurements and installation to ensure everything fits perfectly.
Once you’ve got your microwave securely in place, you’ll appreciate the extra countertop space and the sleek look it brings to your kitchen. Enjoy your newfound space and the convenience of having your microwave right where you need it. Happy cooking!
Frequently Asked Questions
What are the benefits of mounting a microwave under a cabinet?
Mounting a microwave under a cabinet helps reduce countertop clutter and frees up valuable kitchen space. It enhances the kitchen’s appearance by creating a cleaner look and makes the microwave easily accessible for everyday cooking tasks.
What tools do I need to mount a microwave?
You will typically need a stud finder, drill, screwdriver, level, measuring tape, and safety goggles. Additional tools may be necessary based on your specific microwave model and installation requirements.
How do I prepare the cabinet for microwave installation?
Before installation, ensure you measure the cabinet’s width, height, and depth. Check for at least 30 inches of clearance above the microwave for ventilation, clear out any items from the cabinet, and inspect for structural damage.
What is the installation process for mounting a microwave?
Start by locating wall studs to support the microwave. Mark the bracket position, drill pilot holes, attach the mounting bracket securely, align the microwave, insert safety screws, connect any necessary venting, and plug in the appliance.
Are there specific electrical requirements for a mounted microwave?
Yes, it’s crucial to connect the microwave to a dedicated circuit rated at 15 or 20 amps. Ensure there is an accessible power outlet and follow the manufacturer’s instructions for proper electrical connections.
What are the ventilation options for an under-cabinet microwave?
You can choose between ducted venting, which expels air outside, or ductless venting, which recirculates filtered air back into the kitchen. Consider your kitchen’s layout when selecting the best option.
How can I ensure safety during microwave installation?
Check the manufacturer’s weight limits and ensure the cabinet can support the microwave. Use a dedicated grounded outlet, mount at the correct height, and stabilize with wall studs or toggle bolts. Maintain a clutter-free area to prevent fire hazards.
How often should I maintain the microwave’s filters?
Regular maintenance of filtration systems is essential for optimal performance. Check and clean filters every three to six months, and replace them according to the manufacturer’s recommendations to ensure efficient operation.