
Key Takeaways
- Understanding Dispenser Types: Familiarize yourself with various cooking oil dispensers, including pour spouts, squeeze bottles, and pump dispensers, to choose the best method for opening them when stuck.
- Causes of Stuck Dispensers: Common reasons for a stuck oil dispenser include oil residue buildup, temperature changes, moisture, improper storage, and material wear over time.
- Tools for Opening: Use everyday household items such as rubber bands, warm water, towels, and vinegar to effectively loosen stuck dispenser caps.
- Effective Opening Techniques: Apply methods like soaking the cap in warm water or using lubricants such as cooking oil or vinegar to help release tight seals on dispensers.
- Preventive Maintenance: Regularly clean and store dispensers in dry, cool locations, and inspect components to avoid future sticking issues, ensuring your kitchen remains functional.
- Quality and Design Considerations: Invest in high-quality dispensers with features that enhance usability, and always check customer reviews before making a purchase to ensure durability and performance.
Have you ever struggled with a cooking oil dispenser that just won’t budge? You’re not alone. It’s frustrating when you’re ready to whip up a delicious meal, and the oil bottle seems to have a mind of its own.
Understanding Cooking Oil Dispensers
Cooking oil dispensers come in various types and designs, each catering to different preferences and kitchen setups. Understanding these can help you choose the right method for opening a stuck dispenser.
Common Types of Cooking Oil Dispensers
- Pour Spouts: These dispensers feature a built-in spout, allowing for controlled pouring.
- Squeeze Bottles: Flexible bottles that require a gentle squeeze to dispense oil.
- Pump Dispensers: These use a pump mechanism to dispense a specific amount of oil.
- Corked Bottles: Traditional bottles with a cork stopper, which can often become stuck.
- Spray Bottles: Designed for even application, these miss the mark if not properly maintained.
- Oil Residue: Oil buildup can create a seal that traps the dispenser.
- Temperature Changes: Fluctuations in temperature can cause expansion and contraction, leading to a stuck cap.
- Moisture: Water can lead to rust or sticky residue when mixed with oil.
- Improper Storage: Storing dispensers upside down or in cramped spaces can lead to blockages.
- Material Wear: Over time, seals may degrade, causing a tighter fit than intended.
Tools Required for Opening a Stuck Dispenser
You can effectively open a stuck cooking oil dispenser using a few common items. Gather the following tools to simplify the process.
Household Items
- Rubber bands: Use these to enhance grip. Wrap a thick rubber band around the dispenser cap for extra traction when twisting.
- Warm water: Heat some water without boiling. Dip the dispenser cap in warm water to loosen oil residue and make it easier to open.
- Towel: A towel can provide a better grip. Wipe down the dispenser and then use the towel to twist the cap securely.
- Vinegar: If the cap is really stuck, soak a cloth in vinegar and place it around the cap. It helps break down oil buildup.
- Pliers: Adjustable pliers can give you more leverage. Use them gently to avoid damaging the dispenser.
- Screwdriver: A flathead screwdriver works well for gently prying up a stubborn cap. Insert it under the edge and twist carefully to create some space.
- Heating pad: Placing a heating pad around the dispenser can help warm the cap, expanding the material and loosening any stuck parts.
- Bottle opener: Some dispensers have a built-in mechanism that mimics a bottle cap. A bottle opener can help disengage that mechanism effectively.
Step-by-Step Guide on How to Open Cooking Oil Dispenser Stuck
Opening a stuck cooking oil dispenser can be simple with the right techniques. Here are two effective methods to free your dispenser easily.

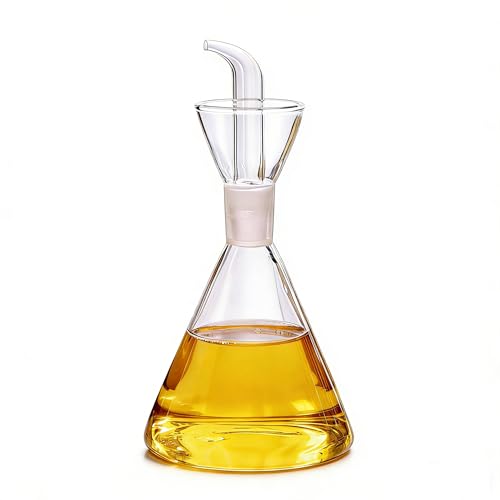
Two flow speeds let you drizzle or pour oil or vinegar with precision

Stainless Steel Olive Oil Dispenser Bottle:Rust-proof, durable, and food-safe construction for long-term kitchen use

Material: Set of 2 The pouring spout is made from food-grade stainless steel and rubber, for liquor bottles or olive oil dispenser bottle, Fit bottle mouth for 0.75"-0.9" inch (an error of 0.1-0.3mm is normal), please measure size of the bottle mouth before buying.
Method 1: Warm Water Technique
- Fill a Bowl with Warm Water: Use warm, not boiling, water to avoid damage.
- Submerge the Lid: Place the dispenser’s lid in the warm water, ensuring the oil residue softens.
- Wait for 5-10 Minutes: Allow the warmth to penetrate and loosen any buildup.
- Try to Unscrew: After soaking, attempt to twist the lid while gently applying pressure. Repeat if it remains stuck.
- Gather Your Lubricants: Use cooking oil, vegetable oil, or vinegar for this method.
- Apply the Lubricant: Drip some oil or vinegar around the cap’s edges, targeting any spaces where buildup may be present.
- Let It Sit for a Few Minutes: Allow the lubricant to work into the crevices.
- Twist and Pull: Using a towel for grip, twist the lid counterclockwise. If it’s stubborn, add more lubricant and try again.
Utilizing these methods can make opening a stuck cooking oil dispenser much easier. Keep your kitchen ready for cooking without the frustrations of stuck dispensers.
Preventing Future Dispenser Stuck Issues
Prevent future problems with cooking oil dispensers by following these simple tips.
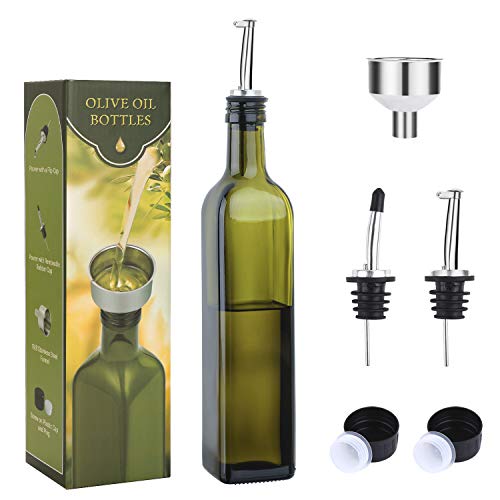
ELEGANT OLIVE OIL DISPENSER BUNDLE - Our glass olive oil bottle with spout stoppers make it easy to dispense oil with appropriate amount - Get less oil consumption and healthier eating.

ELEGANT OLIVE OIL DISPENSER BUNDLE - Our glass olive oil bottle with spout stoppers make it easy to dispense oil with appropriate amount - Get less oil consumption and healthier eating.
[No-Drip, Leak-Proof Pouring]:Holds up to 8 ounces (7.2" x 3.5"); Designed with a precision spout that delivers a clean pour every time. The built-in collar catches drips, keeping your countertops and tabletops free from messy rings. Ideal for olive oil, vinegar, and cooking oils.
Regular Maintenance Tips
- Clean Regularly: Wipe the dispenser’s nozzle and spout after each use to remove any oil residue. This practice minimizes buildup and keeps the dispenser functioning smoothly.
- Store Properly: Keep the dispenser in a cool, dry place. Avoid areas near the stove or where temperature fluctuates frequently, as heat can lead to oil thickening.
- Check for Moisture: Ensure the dispenser is completely dry before storing it. Moisture can create a sticky residue that makes dispensers harder to open.
- Inspect Components: Examine O-rings and seals periodically. Replace worn parts to maintain a tight, functional closure that prevents clogs.
- Select Quality Materials: Opt for dispensers made from durable materials, such as glass or high-quality plastic, which resist wear and tear better than cheaper options.
- Consider Design Features: Look for features like anti-drip spouts or easy-pour ergonomics. These elements reduce spills and keep the dispensing mechanism clear.
- Assess Compatibility: Ensure the dispenser suits the type of oil you use. Some dispensers work better with thicker oils while others are ideal for lighter options.
- Read Reviews: Check customer feedback on a dispenser before purchasing. Reliable reviews provide insights into usability and durability, helping you make an informed choice.
Conclusion
Dealing with a stuck cooking oil dispenser can be a real hassle but you don’t have to let it ruin your cooking experience. With the right techniques and tools you can easily get that stubborn cap off and keep your kitchen running smoothly.
Remember to maintain your dispensers regularly to avoid future frustrations. A little care goes a long way in ensuring your cooking oil is always ready when you need it. Enjoy your time in the kitchen and happy cooking!
Frequently Asked Questions
What are common issues with cooking oil dispensers?
Many users face challenges with cooking oil dispensers getting stuck due to oil residue buildup, temperature changes, and moisture. Over time, the material can wear, further complicating their use. These issues can lead to frustration in the kitchen when trying to pour oil quickly.
How can I open a stuck cooking oil dispenser?
To open a stuck dispenser, you can try submerging the lid in warm water for 5-10 minutes to soften the residue. Alternatively, applying lubricants like cooking oil or vinegar around the cap edges can help loosen it. Household tools like rubber bands and adjustable pliers can also be useful.
What types of cooking oil dispensers are available?
There are several types of cooking oil dispensers, including pour spouts, squeeze bottles, pump dispensers, corked bottles, and spray bottles. Each type caters to different preferences in pouring and storage techniques, making it easier to select one that fits your kitchen setup.
How can I prevent my cooking oil dispenser from getting stuck?
To prevent sticking, regularly clean the dispenser to reduce oil buildup. Store it in a cool, dry place and ensure it’s completely dry before storage. Additionally, inspect components like O-rings and seals, and consider durable materials for longer-lasting use.
What tools can help in opening a stubborn dispenser?
Tools like rubber bands can improve grip, while warm water can loosen oil residue. You might also use towels for handling, adjustable pliers for leverage, or a flathead screwdriver to pry the cap. A heating pad can help expand the material if needed.