
Have you ever looked at your wall-mounted microwave and wondered how to take it down? Maybe you’re remodeling your kitchen or just need to replace an old unit. Whatever the reason, removing a wall microwave can feel daunting, especially if you’re not sure where to start.
Key Takeaways
- Types of Wall Microwaves: Understand the three main types—built-in, over-the-range, and compact—each offering unique benefits in design and functionality.
- Safety First: Always start by unplugging the microwave, turning off the circuit breaker, and wearing protective gear to ensure a safe removal process.
- Necessary Tools: Gather essential tools like screwdrivers, a power drill, a stud finder, and a level to assist in the removal and proper installation of a new unit.
- Step-by-Step Process: Follow a straightforward approach: disconnect power, remove mounting hardware, and enlist help to safely lift the microwave from its mounting.
- Common Challenges: Anticipate challenges such as weight management and improper installation by preparing adequately and seeking assistance when necessary.
- Post-Removal Care: After removing the microwave, clean the area and keep all screws and components in a safe place for potential reuse during installation of a new unit.
Understanding Wall Microwaves
Wall microwaves are designed for installation within kitchen cabinetry, offering convenience and saving space. Knowing their types and benefits helps you make informed decisions about your kitchen appliances.
Types of Wall Microwaves
- Built-in Microwaves: Installed directly into a wall cabinet, built-in microwaves provide a sleek look and free up counter space.
- Over-the-Range Microwaves: These units double as a range hood, combining cooking and ventilation without losing valuable countertop area.
- Compact Microwaves: Smaller models meant for limited spaces, compact microwaves fit neatly into smaller cabinets or closets while still delivering essential cooking functions.
- Space-Saving Design: Wall microwaves maximize kitchen space, keeping countertops clear for other activities.
- Improved Accessibility: Mounting a microwave at eye level ensures easy access for adults without bending or stretching.
- Aesthetics: Wall-mounted designs enhance kitchen aesthetics, providing a modern look and integrating seamlessly into the overall kitchen design.
- Ventilation Options: Over-the-range models offer ventilation, removing smoke and odors while cooking, improving kitchen air quality.
Preparing for Removal
Preparing for the removal of your wall microwave ensures a smooth process. Follow these steps to make sure you’re ready to proceed safely and efficiently.

BEAUTIFY THE KITCHEN: When using an over the range microwave convection oven that is slimmer than the cabinet space this universal microwave trim kit will cover up the empty space.

DIFFERENT SIZE MIXING CUPS- 2pcs of 250ml/8oz measurements cups for larger resin crafts projects and 4pcs of 100ml/3oz cups, the calibrations(ml) on the outside of cups can make your measurements more accurat, and 4pcs mixing Cups for small capacity requirement.

DIFFERENT SIZE - 1pcs 700ml/23oz oversize measuring cup, 1pcs of 250ml/8oz measurements cups for larger resin crafts projects and 3pcs of 100ml/3oz cups and 4pcs mixing Cups for small capacity requirement.
Safety Precautions
- Unplug the Microwave: Always start by disconnecting power. Locate the plug behind the unit and remove it from the outlet.
- Turn Off the Circuit Breaker: Ensure safety by turning off the circuit breaker connected to the microwave. This prevents any accidental power surges.
- Wear Protective Gear: Use safety goggles and gloves. This protects against sharp edges and any debris during removal.
- Secure the Area: Clear the surrounding space. Remove any objects or obstacles near the microwave to avoid tripping hazards.
- Screwdriver: A standard or Phillips screwdriver allows you to remove screws securing the microwave to the wall.
- Drill: A power drill helps in removing screws quickly, especially if they are rusted or stuck.
- Stud Finder: Use a stud finder to locate the vertical support behind the microwave for safe mounting of any replacement unit.
- Level: A level ensures the new microwave is installed properly after removal.
- Towel or Soft Cloth: Keep a towel or cloth handy for cleaning any mess or wiping down surfaces after removal.
- Ladder: If the microwave is high, a ladder provides extra height for easier access.
By taking these precautions and gathering the necessary tools, you’ll set the stage for a successful microwave removal process.
Step-by-Step Guide to Remove Wall Microwave
Removing a wall microwave involves a few straightforward steps. Following the proper methods ensures safety and efficiency during the process.

Complete Mounting Kit with Column Level:This W11025649 & 8205948 microwave mounting plate bracket kit comes with everything needed for install: 1 mounting bracket (measuring 29.6” x 2.1” for maximum support), 1 column level to ensure perfect alignment, and a full set of hardware screws (including assorted screws, washers, and clips—quantities match the detailed hardware layout in product images). No extra components are needed, making this kit a comprehensive solution for hassle-free installation

Wide Compatibility, Multi-Model Fit & Direct OEM Replacement:Directly replaces OEM part numbers: WB56X35363, AP6986668, PS16216996, WB56X10669, 1167916, AH1021820, EA1021820. Specifically designed for GE microwaves, compatible with multiple mainstream series including (but not limited to) PVM high-end wall-mounted series (PVM9179SK5SS, PVM9215SK5SS), CVM microwave-range hood combo series (CVM521P2M5S1, CVM517P3M5D1), JVM/JNM/DVM regular series (JVM7195SK5SS, JNM7196DK5BB), and general models like 36363672200, 36363679200. For specific models, use "Ctrl+F" to search the product detail page for quick verification.
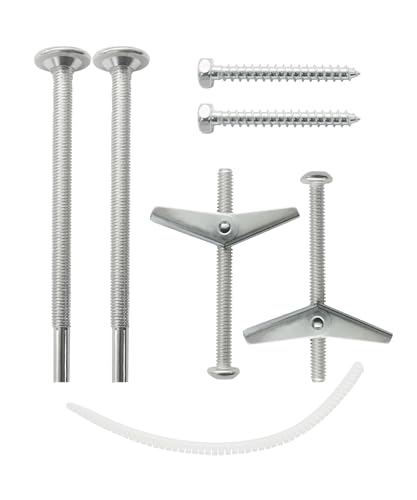
Package Contents:You will get 2*bolts,2*screws,2*screw with butterfly anchors,1*toothed plastic strip,to ensure your microwave stays firmly in place
Disconnecting Power Supply
- Unplug the Microwave: Locate the microwave’s power cord and pull it from the outlet. If it’s hard to reach, turn off the power at the circuit breaker.
- Verify Power is Off: Use a voltage tester to confirm that the microwave is no longer receiving power. Safety first to avoid shocks.
Removing Mounting Hardware
- Locate Mounting Screws: Check the microwave’s top and bottom for screws that secure it to the wall or cabinet. Use a stud finder if necessary to identify wall anchors.
- Remove Screws: Use a screwdriver or drill to take out the screws, keeping them in a safe place for later use or disposal.
- Check for Additional Brackets: Some models may have brackets under the microwave. Remove all hardware to free the appliance from the wall.
- Get Help if Needed: Wall microwaves can be heavy. Enlist someone to assist you in lifting it off the mounting.
- Tilt and Lift: Tilt the microwave slightly to disengage from any brackets, then lift it straight out from the wall.
- Place in a Safe Location: Set the removed microwave on a stable, flat surface to avoid damages or injuries.
Ensure all steps are followed carefully for a smooth removal process.
Common Challenges and Solutions
Removing a wall microwave presents challenges, particularly if you’re unfamiliar with the process. Several common issues arise, but solutions exist to help you navigate them.

【HIGH QUALITY】 Our microwave Oven Wall Holder is made of professional quality stainless steel, anti-rust and wear-resistant for a long service time, strong bearing strength (more 110lb/50kg).

Ideal Use for Outdoor Air Exhaust Applications: Microwave vent,range hood vent,Kitchen vent hood wall vent,microwave hood vent,stove vent,kitchen wall vent,external extractor wall vent,range exhaust fan vent,bathroom exhaust fan vent & extractors,microwave exhaust hood vent,kitchen fan vent,stove fan vent, wall exhaust,wall air vent, range external vent, cooker range hood extractors and other uses.

Product Overview: 8171339 Universal microwave filler kit, Fills Over the Range Microwave Oven Cabinet Gap, 15.75"L, 10.83"W, 2.95"H, w/16 Screws, please make sure to measure your microwave first before buying
Handling Weight and Size
Heavy wall microwaves can be difficult to manage. You might struggle to lift the unit alone, leading to potential injuries or damage. To address this:
- Recruit Help: Always ask for a friend or family member’s assistance when lifting the microwave.
- Use Proper Technique: Bend your knees, keep your back straight, and lift with your legs to avoid strain.
- Utilize Furniture Moving Straps: Consider using straps to help distribute the weight and make lifting easier.
Dealing with Improper Installation
Improper installation often complicates removal. This may include missing screws or unsupported mounting brackets. If this situation arises:
- Inspect the Mount: Examine the mount carefully to locate all screws and brackets. Check for hidden ones behind the appliance.
- Use a Stud Finder: If screws are difficult to find, use a stud finder to ensure you locate all mounting points securely attached to the wall.
- Seek Guidance: If the installation appears particularly complex, refer to the microwave’s installation manual or online resources for additional instructions.
By anticipating and addressing these challenges, you can simplify the process of removing your wall microwave.
Conclusion
Removing a wall microwave might seem like a daunting task but with the right preparation and approach you can tackle it confidently. By following the steps outlined and taking necessary safety precautions you’ll not only ensure a smooth removal but also set the stage for your kitchen upgrade or appliance replacement.
Remember to enlist a friend to help you out. It makes the process easier and safer. Once you’ve got your microwave off the wall you’ll be ready to move forward with your kitchen plans. Enjoy your newly freed-up space and the exciting possibilities that come with it. Happy remodeling!
Frequently Asked Questions
What are the common reasons for removing a wall-mounted microwave?
Removing a wall-mounted microwave is often due to kitchen remodeling, replacing an old unit, or upgrading to a more efficient model. These updates can improve the overall aesthetic of the kitchen and enhance functionality.
How do I prepare for removing a wall microwave?
Preparation involves unplugging the microwave, turning off the circuit breaker, and wearing protective gear. Clear the area of obstacles to ensure a safe and organized workspace for the removal process.
What tools do I need to remove a wall-mounted microwave?
Essential tools include a screwdriver, drill, stud finder, level, towel or cloth, and a ladder. Having these tools will make the removal process easier and more efficient.
Can I remove a wall microwave by myself?
While it’s possible to do it alone, it is highly recommended to enlist help due to the weight and size of the microwave. Proper lifting techniques can prevent injury and damage.
What should I do if I encounter challenges during removal?
If you face challenges, such as improper installation or missing hardware, check for secured screws and use a stud finder. Consulting the microwave’s installation manual can also provide valuable guidance.