
Have you ever noticed your microwave isn’t heating food like it used to? If so, a faulty diode might be the culprit. This common issue can leave you frustrated, but don’t worry—replacing the diode is a straightforward fix you can tackle yourself.
Key Takeaways
- Function of Microwave Diodes: Microwave diodes are essential for converting electrical energy to microwave energy, ensuring the magnetron operates correctly to heat food.
- Common Diode Issues: Faulty diodes can lead to problems such as no heating, intermittent heating, or even a burnt smell due to overheating.
- Safety Precautions: Always unplug the microwave, discharge the capacitor, and wear safety gear before attempting repairs to prevent electrical shock and injuries.
- Essential Tools for Replacement: Have a multimeter, screwdriver set, needle-nose pliers, a compatible replacement diode, and insulation tape ready before starting the replacement process.
- Step-by-Step Replacement Process: Carefully disconnect the microwave, access and remove the old diode, and properly install the new one to ensure safe and efficient operation.
- Post-Replacement Testing: After replacing the diode, test the microwave by checking power-up indicators, heating water, and using various settings to confirm proper functionality.
Understanding Microwave Diodes
Microwave diodes play a crucial role in the heating process of your microwave. Understanding their function helps you identify issues and replace them effectively.
What Is a Microwave Diode?
A microwave diode is a semiconductor device that converts electrical energy into microwave energy. It regulates the flow of current within the microwave, ensuring the magnetron receives the right amount of power. Diodes ensure that microwaves heat food by preventing reverse current, which could damage the magnetron. If this component fails, your microwave won’t heat properly.
Common Issues with Microwave Diodes
Faulty microwave diodes can lead to several problems, including:
- No Heating: If the diode fails, the magnetron may not receive power, resulting in cold food.
- Intermittent Heating: Sometimes the microwave may heat food irregularly due to a diode that’s partially functioning.
- Burnt Smell: A damaged diode can produce a burnt smell, indicating overheating.
Testing for these issues usually involves using a multimeter to check for diode functionality. If any faults appear, replacing the diode can restore your microwave’s efficiency.
Preparing for Replacement
Before replacing the microwave diode, gather the necessary tools and materials. Preparing adequately helps ensure a smooth process and enhances safety during the repair.

Include (1) HVR-1X4 Microwave Oven High Voltage Diode Rectifier.

Include (2 PCS) 12 KV Microwave High Voltage Diode Replaces for GE Panasonic Microwave Rectifier .

CL04-12 12KV MICROWAVE DIODE FOR W10245187 W10492278 AND OTHERS
Tools and Materials Needed
- Multimeter: Use this to test the diode’s functionality before replacement.
- Screwdriver Set: Phillips and flat-head screwdrivers are essential for accessing the microwave’s casing.
- Needle-Nose Pliers: Utilize these for grasping and maneuvering wires in tight spaces.
- Replacement Diode: Purchase a diode compatible with your microwave model. Refer to the user manual for specifications.
- Insulation Tape: This helps secure any exposed wires after the replacement.
- Unplug the Microwave: Always disconnect the microwave from the power source before starting any repairs.
- Discharge Capacitor: The capacitors inside microwaves can hold a charge even when unplugged. Use a discharge tool or follow manufacturer instructions to safely discharge the capacitor.
- Wear Safety Gear: Use safety goggles and gloves to protect against injury from sharp edges or electrical components.
- Work in a Well-Lit Area: Ensure your workspace is well-lit to avoid mistakes or accidents during the repair process.
Step-by-Step Guide to Replacing a Microwave Diode
Follow these steps to replace a faulty microwave diode effectively. Each section outlines important actions to ensure a successful repair.
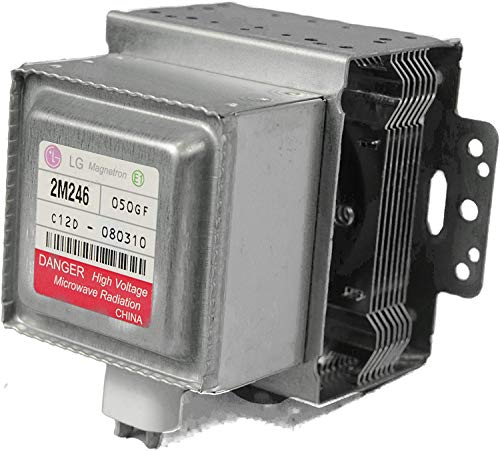
This LG Magnetron is a genuine OEM (Original Equipment Manufacturer) part manufactured to exact specifications

【Compatibility】WB27X10682 Magnetron RM269 for GE Microwave Oven Repair Part Replace WB27X10559 1086312 2M319J 2M219J Magnetron;

[Adaptive Brand] Our 2m261-32m Microwave Oven Magnetron is compatible with the following brands: LG, Kenmore, Whirlpool, Panasonic, etc. 2M261-32M Magnetron for Panasonic Inverter Microwave Oven NN-CF771S, Replaceable part numbers are 2M236-M32 2M236-M42. Please make sure the model matches before purchase, please pay attention to the magnetron heat dissipation direction and model number
Disconnecting the Microwave
- Unplug the microwave from the electrical outlet. Safety first—this prevents any risk of electrical shock.
- Move the microwave away from the wall. Ensure enough space to work comfortably.
Accessing the Diode
- Use a screwdriver to remove the outer casing screws. Keep these screws in one place for easy access during reassembly.
- Carefully lift off the outer casing. This exposes the internal components of the microwave.
Removing the Old Diode
- Locate the diode, usually near the magnetron. Refer to your microwave’s manual for the exact position if unsure.
- Use needle-nose pliers to gently disconnect any wires attached to the diode. Note the orientation and placement for the new diode.
- Remove any screws or clips holding the diode in place, then take out the old diode.
Installing the New Diode
- Position the new diode in the same orientation as the old one. Ensure it fits securely.
- Reattach any screws or clips to hold the diode in place.
- Connect the wires back to the diode. Ensure a firm and secure connection, matching the original setup.
- Carefully replace the outer casing of the microwave. Align it properly to avoid any gaps.
- Use the screwdriver to secure the screws you previously removed. Ensure the casing is tightly fitted.
- Plug the microwave back into the outlet and perform a test run. Check for proper heating to confirm the diode replacement was successful.
Following these steps helps ensure your microwave functions efficiently once again.
Testing the Microwave
After replacing the microwave diode, testing the appliance ensures everything functions correctly. Follow these steps to verify the microwave’s performance.

PREMIUM QUALITY: The replacement part is made from durable high-quality material and well-tested by the manufacturer - It meets OEM standards - Ensures long-lasting and effective performance.
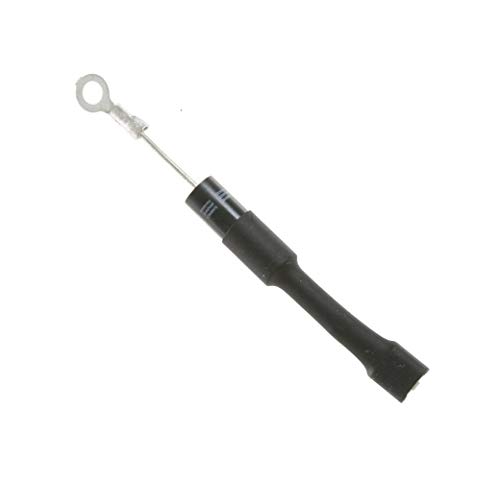
Production Name: Microwave High Voltage Diode, Withstand Voltage: 12 KV, Rated Current:450 mA,O Terminal Diameter: 4.2mm/0.17in, Female Terminal Size:1/4 in/6.3 mm Standard
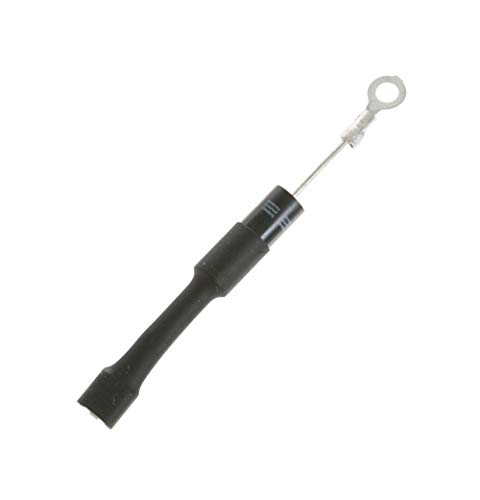
Production Name: Microwave High Voltage Diode, Withstand Voltage: 12 KV, Rated Current:350 mA,O Terminal Diameter: 4.2mm/0.17in, Female Terminal Size:1/4 in/6.3 mm Standard
Initial Power-Up
Plug the microwave back into the electrical outlet. Check if the display lights up and listen for any sounds, which indicate the microwave is receiving power. If nothing happens, double-check your connections and ensure the outlet is functional.
- Select Different Power Levels: Use the control panel to set various power levels. This allows you to confirm that the microwave responds appropriately to your settings.
- Heat Water: Place a microwave-safe container filled with water inside. Heat it on high for two to three minutes. Check if the water reaches a boil. If it heats effectively, the diode replacement likely succeeded.
- Test Timing Functions: Set the timer for a specified time. Listen for the timer beep once the time expires to verify its functionality.
- Use Different Settings: Test functions like defrost or popcorn. If these settings work properly, the microwave shows signs of effective repairs.
- Check for No Abnormal Sounds: Listen for unusual noises during operation. Sounds like humming or buzzing may indicate an underlying issue.
By performing these tests, you confirm the repairs and ensure the microwave works efficiently.
Conclusion
Replacing your microwave diode can seem daunting but it’s a manageable task that can save you time and money. By following the steps outlined and taking the necessary precautions, you can restore your microwave to full functionality.
Remember to test your microwave after the replacement to ensure everything’s working smoothly. With a little patience and care, you’ll have your appliance heating up your meals in no time. Enjoy the satisfaction of fixing it yourself and getting back to your daily routine!
Frequently Asked Questions
What causes a microwave not to heat food?
A microwave might not heat food effectively due to a faulty diode, which is essential for converting electrical energy into microwave energy. Other potential causes include a broken magnetron, a defective high-voltage capacitor, or issues with the control board.
How can I tell if my microwave diode is faulty?
Common symptoms of a faulty diode include no heating, intermittent heating, and a burnt smell inside the microwave. Using a multimeter to test the diode’s functionality can help confirm if it needs replacement.
Is replacing a microwave diode difficult?
Replacing a microwave diode is a manageable task for many DIYers. With the right tools and careful following of instructions, most people can replace it themselves. However, safety precautions must be taken due to the high voltage components.
What tools do I need to replace a microwave diode?
To replace a microwave diode, you will need a multimeter, screwdriver set, needle-nose pliers, a compatible replacement diode, and insulation tape. It’s essential to gather all necessary tools before starting the repair.
What safety precautions should I take when replacing a microwave diode?
Always unplug the microwave before starting repairs. Discharge the capacitor, wear safety gear, and work in a well-lit area to avoid accidents while replacing the diode.
How do I test my microwave after replacing the diode?
After replacing the diode, test your microwave by checking the display, listening for sounds upon power-up, heating water, and using different settings like defrost. Ensure there are no abnormal sounds during operation for proper functionality.
Can a faulty diode be repaired instead of replaced?
A faulty microwave diode is typically not repairable and should be replaced to ensure safe and efficient operation of the microwave. Attempting to repair it may lead to further issues.
How do I access the microwave diode for replacement?
To access the microwave diode, start by disconnecting the microwave from the power source and removing the outer casing. Follow the manufacturer’s guidelines for detailed instructions on how to safely access internal components.